How to Use Digital Stickers in GoodNotes
Do you love using stickers in your GoodNotes planners and notebooks but struggle with adding them from a sticker book or from your photos app. I’ll let you know how you can use the Elements feature to easily use your stickers in all your planners and notebooks.
The new Elements Tool makes it easy to save and reuse stickers (and text) across all your documents. Much easier than using sticker books or adding each sticker one-by-one from your photos app or cloud service. See GoodNotes introduction of the new Elements feature below.
How to import stickers into GoodNotes Elements when you have a .collection file
Step-by-step guide to import single stickers into a GoodNotes Elements collection
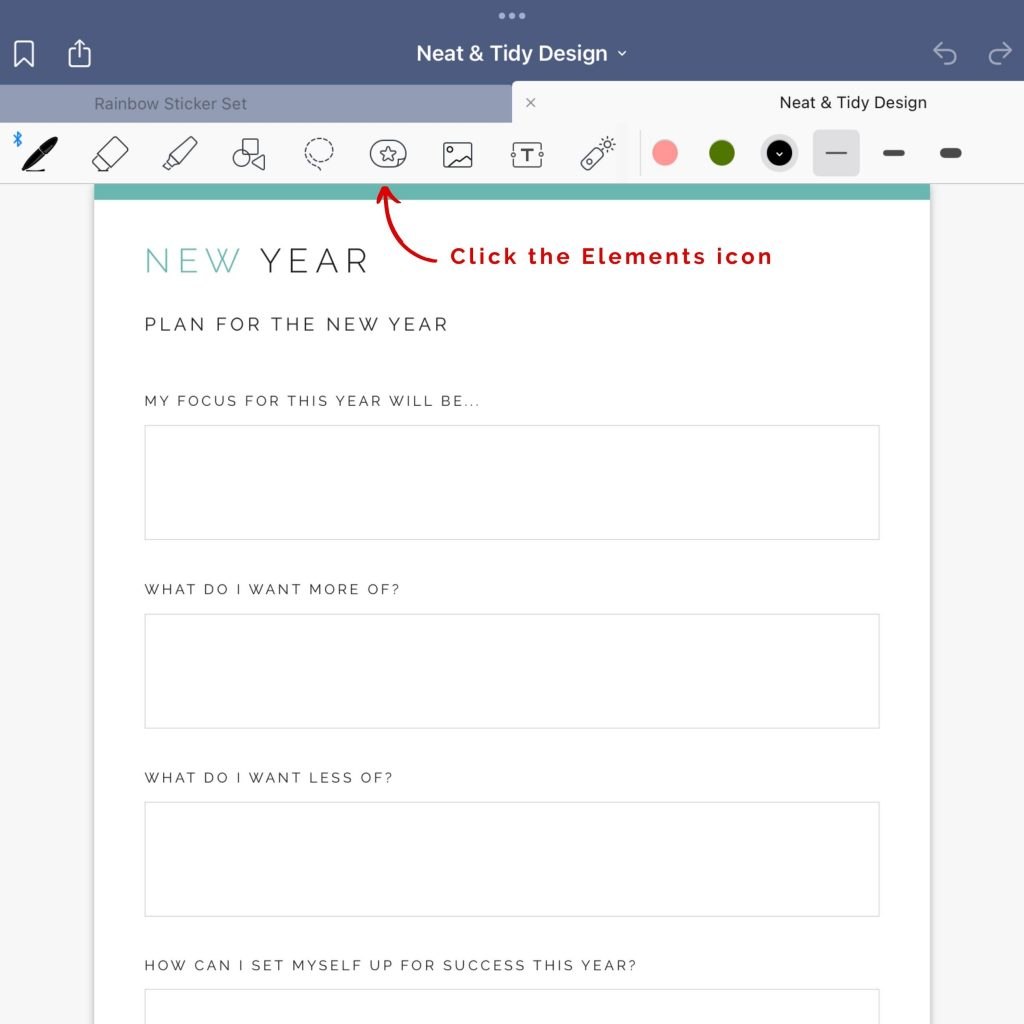
Step one.
Click the Elements icon in the top bar. Make sure you’re in Write mode.
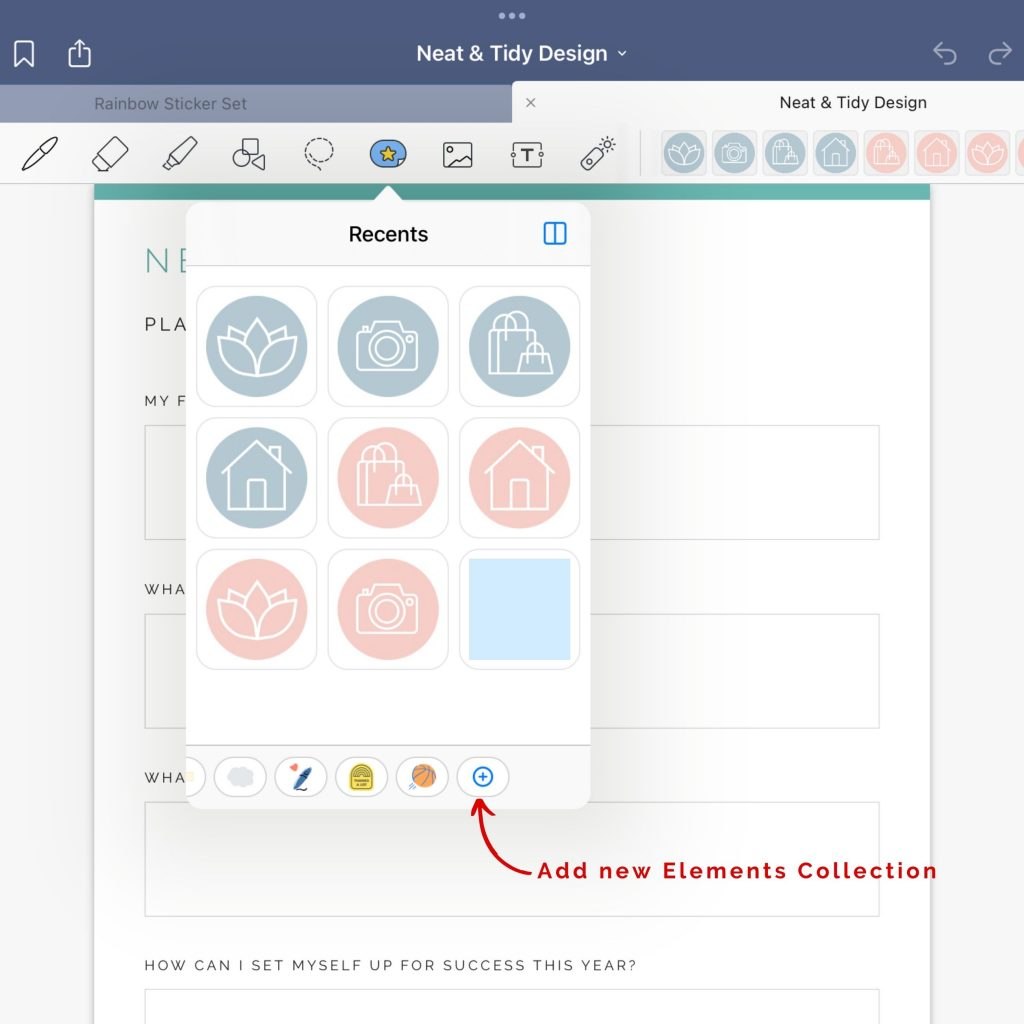
Step two.
Click the plus sign to create a new Elements collection.
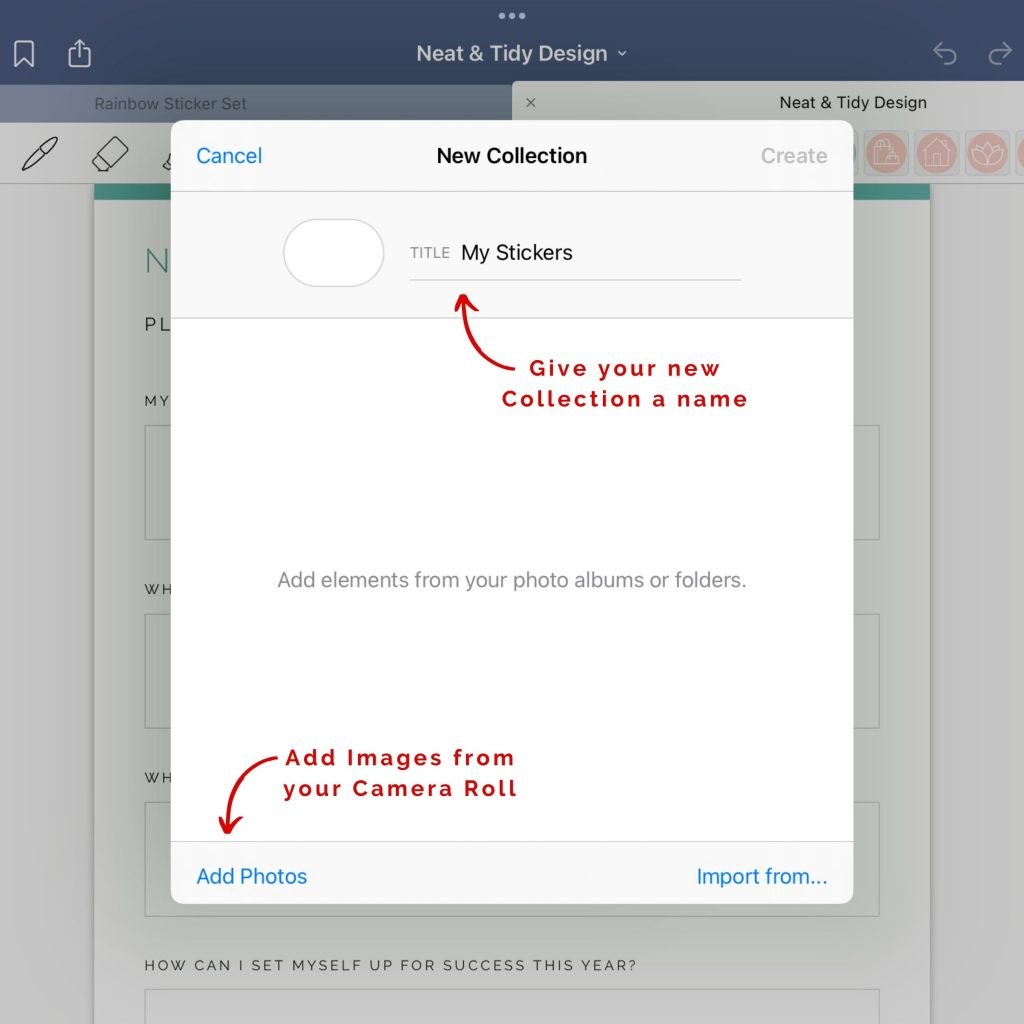
Step three.
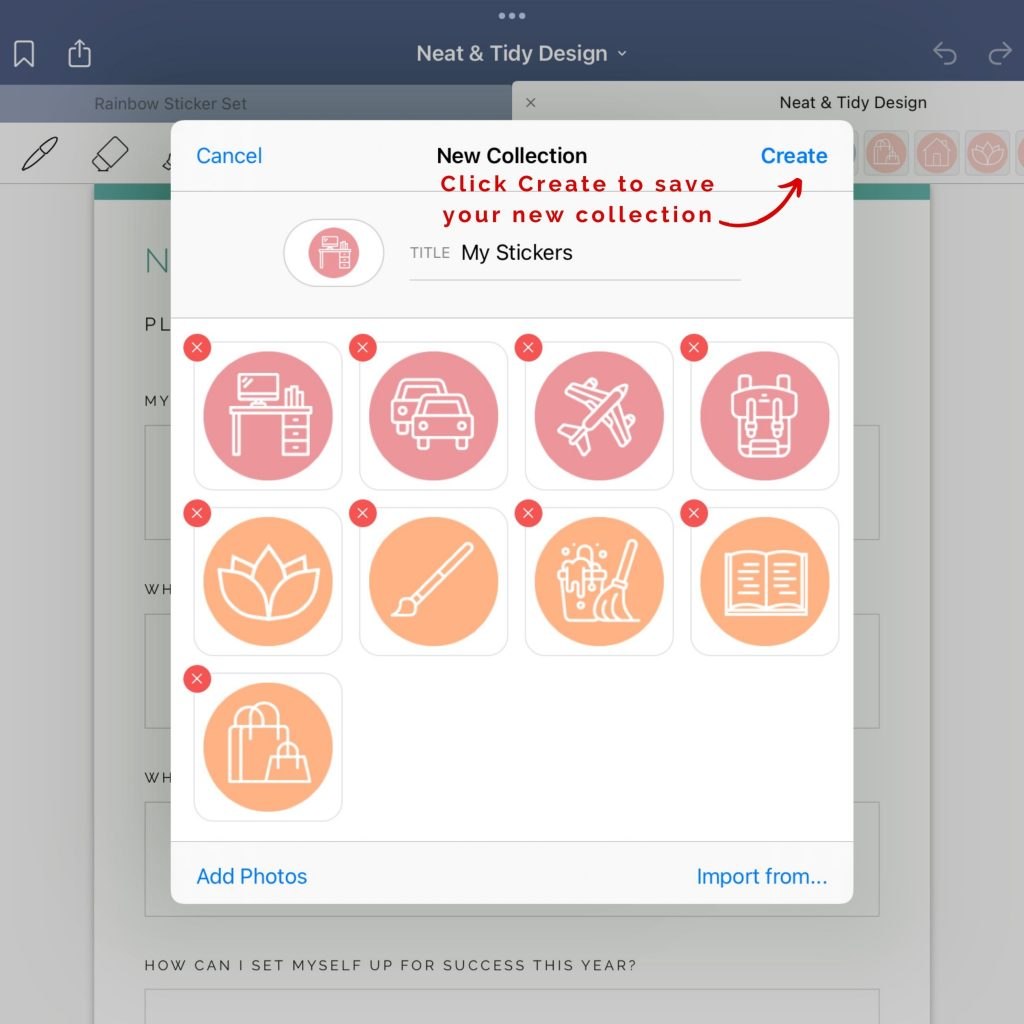
Give your new Collection a name in the Title field. Then click Add Photos in the bottom left corner to add images from your camera roll.
Step four.
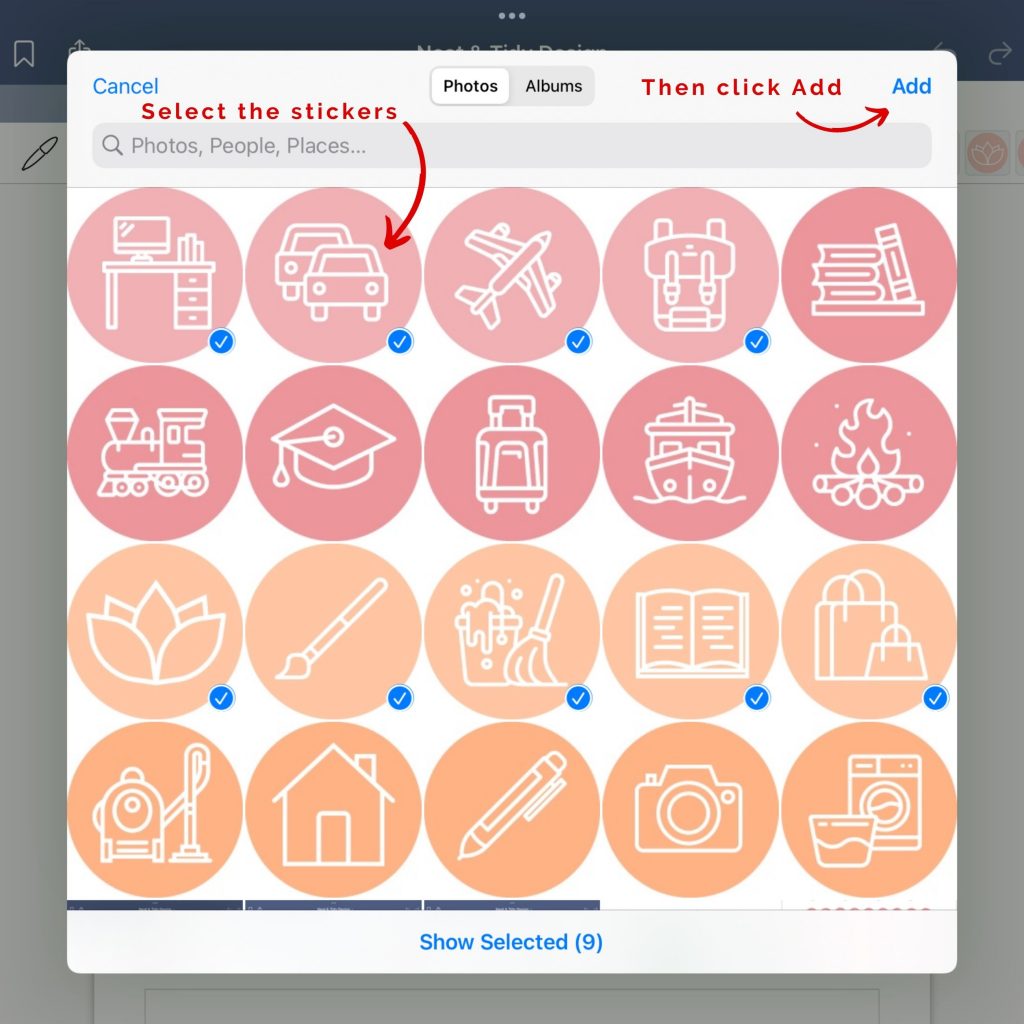
Select the stickers/images you want to add to your collection. Tap an image to select it. Then click Add in the top right corner when you’re done.
You can always go back and add more stickers at a later date.
Step five.
Click Create in the top right corner to save your new collection.
You can also select text or images in your documents and add them as elements too. This is useful for lists of tasks you perform often and want to add to many of your calendar pages for instance. The Elements feature is a really handy tool that will make your planning and note taking easier and quicker.
